
In this post a very good hack has been explained which is quite important from SEO point of view. Title & Description hack has pros and cons. Cons is you will have to write different title for each post. Of course it is bit tedious thing to do. If there are five posts, you got to write five different titles for each five posts which you want to allot different title to. How about giving title to a post-page with a title that you write when writing a post? Exactly like wordpress. You don%u2019t need to write different title for each posts. The title that you write while writing post will be title of the entire post-page.
This hack will do that. Follow below procedures%u2026..
Go to Setting and change your title to a dot
Go to Layout >> Edit Html, tick Expand widget Template
Find code given below
<title><data:pagetitle/></title>
Replace it with%u2026
<title>
<b:if cond=%u2019data:blog.url == data:blog.homepageUrl%u2019>
This is Home Page Title<b:else/>
<data:blog.pageTitle/>
</b:if> </title>
Next find code given below%u2026.
<b:if cond=%u2019data:blog.url == data:blog.homepageUrl%u2019>
<data:title/>
<b:else/>
<a expr:href=%u2019data:blog.homepageUrl%u2019><data:title/></a>
</b:if>
</h1>
and replace it with%u2026..
<a expr:href=%u2019data:blog.homepageUrl%u2019>Your H1 Tag </a>
</h1>
Change the red text as per your requirements. Save the template and you are done.
Showing posts with label Blogger Hacks and Tricks. Show all posts
Showing posts with label Blogger Hacks and Tricks. Show all posts
Friday, April 3, 2009
Remove Label Posts Count From Blogger
How to Remove Label Posts Count From Blogger showing the count of posts in that particular category.As you have seen in categories in sidebar that always shows that how many posts are there in that category or label. As its clear from the picture below what i am trying to say.Its just simple step to remove the label count just follow the below step:-

Bowse To Settings > Edit Html > Expand Widgets
Press Ctrl+ F and search for below line
And delete it . Just Simple.
You will get this line in the codes in this way
You can delete all codes.
Now check how it looks .

Bowse To Settings > Edit Html > Expand Widgets
Press Ctrl+ F and search for below line
<data:label.count/>
And delete it . Just Simple.
You will get this line in the codes in this way
<span dir='ltr'>(<data:label.count/>)</span>
You can delete all codes.
Now check how it looks .
Change Older Post And Newer Post Link With Images Blogger
Change Older Post And Newer Post Link With icons or images in Blogger is very nice trick to make your blog look very beautiful.As it make your blog look more beautiful than before if you are using good icons to be get replaced with older post or newer post or home link.Today i will tell you how easy it is to hide those links and place your any image you like.
These are the links below pointed by arrows to be get replaced in picture which i was talking about.
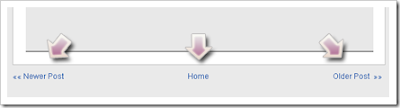
Now how to change these links with icons is very easy.
Got to LAYOUT > Edit HTML > Expand Widgets
Now follow these steps to replace codes :-
Find the code in red lines and replace them with lines in green following each red line-
1.<data:newerPageTitle/>
Replace with
<img src='http://bandofgirls.googlepages.com/Newer_post_icon.png'/>
2.<data:olderPageTitle/>
Replace with
<img src='http://bandofgirls.googlepages.com/older_post_icon.png'/>
3.<data:homeMsg/>
Replace with
<img src='http://bandofgirls.googlepages.com/home_icon.png'/>
Please Host these images to your hosting image service and change these urls with yours as they may exceed bandwidth.
These are the links below pointed by arrows to be get replaced in picture which i was talking about.
Now how to change these links with icons is very easy.
Got to LAYOUT > Edit HTML > Expand Widgets
Now follow these steps to replace codes :-
Find the code in red lines and replace them with lines in green following each red line-
1.<data:newerPageTitle/>
Replace with
<img src='http://bandofgirls.googlepages.com/Newer_post_icon.png'/>
2.<data:olderPageTitle/>
Replace with
<img src='http://bandofgirls.googlepages.com/older_post_icon.png'/>
3.<data:homeMsg/>
Replace with
<img src='http://bandofgirls.googlepages.com/home_icon.png'/>
Please Host these images to your hosting image service and change these urls with yours as they may exceed bandwidth.
How Change Width Of Drop Down Archive Blogger
How Change Width Of Drop Down Archive Blogger,I have an old post that is how to add a drop down archive to a blogger,as this simple option is provided by google themeslves. But the width of the drop down archive is problem in blogger as its width is fixed and doesn't adjust the sidebar of bloggers.
If you have drop down archive in your blog and has an problem with its width then only read this or else you want drop down archive in your blog read this post.
Now i will tell you how to make drop down archive adjust to your sidebar.
Go to LAYOUT > Edit HTML > Expand Widgets > Press Ctrl + F > Now Search For Below codes
And Replace the above codes with below codes:-
<b:includable id='menu' var='data'>
<select expr:id='data:widget.instanceId "_ArchiveMenu"' style='width:100%'>
<option value=''><data:title/></option>
<b:loop values='data:data' var='i'>
<option expr:value='data:i.url'><data:i.name/> (<data:i.post-count/>)</option>
</b:loop>
</select>
</b:includable>
The difference between the codes is only the red line we have added. I made you to replace codes instead of adding red line,so as you don't make any mistake while adding.
If you have drop down archive in your blog and has an problem with its width then only read this or else you want drop down archive in your blog read this post.
Now i will tell you how to make drop down archive adjust to your sidebar.
Go to LAYOUT > Edit HTML > Expand Widgets > Press Ctrl + F > Now Search For Below codes
<b:includable id='menu' var='data'>
<select expr:id='data:widget.instanceId "_ArchiveMenu"'>
<option value=''><data:title/></option>
<b:loop values='data:data' var='i'>
<option expr:value='data:i.url'><data:i.name/> (<data:i.post-count/>)</option>
</b:loop>
</select>
</b:includable>
And Replace the above codes with below codes:-
<b:includable id='menu' var='data'>
<select expr:id='data:widget.instanceId "_ArchiveMenu"' style='width:100%'>
<option value=''><data:title/></option>
<b:loop values='data:data' var='i'>
<option expr:value='data:i.url'><data:i.name/> (<data:i.post-count/>)</option>
</b:loop>
</select>
</b:includable>
The difference between the codes is only the red line we have added. I made you to replace codes instead of adding red line,so as you don't make any mistake while adding.
How Create 'To The Top Of Page' Link For Blogger
How to create to the Top of the page Button link for blogger,all websites and blogs have this to the top of page button at the bottom of there page.As it is very helpful for the sites and blogs which have long pages to scroll.So lets implement this top of the page link button just by adding small piece of codes to your blogger.
Login to your Blogger go to
Dashboard > Layout > Page elements > Add a Page Element > Html/Javascript
and add the below codes there and Save it.
Change the image to your if you want yours,change the red link in above codes.
Login to your Blogger go to
Dashboard > Layout > Page elements > Add a Page Element > Html/Javascript
and add the below codes there and Save it.
<a style="display:scroll;position:fixed;bottom:5px;right:5px;" href="#" title="Back to Top"><img src="http://www.incontext.indiana.edu/images/to_top_arrow.gif" /></a>
Change the image to your if you want yours,change the red link in above codes.
How to remove the quick edit and wrench icons on blogger
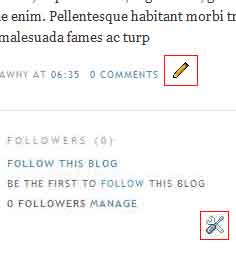
so to hide the quick edit icon below the post footer go to layout > page elements and click the edit link for the post widget from within your dashboard and uncheck the checkbox titled "Show Quick Editing" then save now those icons shouldn't show below the post
but they are still showing in the sidebar to remove them go to layout > edit HTML and expand the widget templates and look for the following code
<b:include name='quickedit'/>
each widget you have in the sidebar will have one of them so to save time having to remove each one of them just paste the following code anywhere inbetween the opening <b:skin> tag and the closing </b:skin> tag in your template to hide them
.quickedit{display:none;}
now you can get rid of those icons if you dont want them showing i hope you find this useful and thanks for reading
Thursday, March 26, 2009
Add Google Talk to Blogger
I'm sure you are surely knew what is the Google Talk, with google talk you can send instant messages, make voice calls, leave voicemail messages, transfer files and etc, however of course must with other google user. Do you know, now you can add google talk to your blog? not yet known its way? please follow the steps following :
1. Login to blogger with your ID.
2. After entering the dasboard page , click Layout.
3. Click at Page Element tab.
4.Click at Add a Page element.
5.After emerging pop up window , click add to blog button for the things HTML/JavaScript. See the picture following :
javascript
6.Copy and paste the code below into available column :
7. Click Save Changes
8. Finish. Please see the result.
Now you have a Google Talk at your blog.
1. Login to blogger with your ID.
2. After entering the dasboard page , click Layout.
3. Click at Page Element tab.
4.Click at Add a Page element.
5.After emerging pop up window , click add to blog button for the things HTML/JavaScript. See the picture following :
javascript
6.Copy and paste the code below into available column :
<iframe width="234" frameborder="0" src="http://talkgadget.google.com/talkgadget/client?fid=gtalk0&relay=http%3A%2F%2Fwww.google.com%2Fig%2Fifpc_relay" height="350">
</iframe><p style="margin:-8px 0"><br /><center>
<a style="text-decoration:none;font-size:70%;" href="http://noob.niteshkothari.com">Add to your blog</a></center></p>
7. Click Save Changes
8. Finish. Please see the result.
Now you have a Google Talk at your blog.
How To make the menu drop down?
Do you ever seen the menu such as menu below? please click at the menu to see the effect of this menu :
The name of this menu is drop down menu.
To make the dropdown menu, you only make the code be like this :
For example, the code such as the following :
This is the result :
You can make the drop down menu more than one, just make the code more than one, so very simple.
Now, how to add this code to your blog. This is the step :
1. Login to blogger with your ID
2. After entering the dasboard page , click Layout.
3. Click at Page Element tab.
4. Click at Add a Page element.
5. After emerging pop up window , Click add to blog button for the things HTML/JavaScript.
6.Copy and paste the code below into available column :
7. Click Save
8. Finish. Please see the result.
Now you have a dropdown menu at your blog.
The name of this menu is drop down menu.
To make the dropdown menu, you only make the code be like this :
<form><select name="menu" onchange="window.open(this.options[this.selectedIndex].value,'_blank')"size=1 name=menu><option value=0 selected> Your text title here! </option>
<option value=" your address link here "> the text here will be display </option> </select></form>
For example, the code such as the following :
<form><select onchange="window.open(this.options[this.selectedIndex].value,'_blank')" size="1" name="menu"><option>- Blog FOr Noob - </option><!-- change the links with your own --><option value="http://niteshkothari.com">Start to blogging</option> <option value="http://niteshkothari.com">Blog setting</option> <option value="http://niteshkothari.com">Backup template</option> <option value="http://niteshkothari.com">backup widget</option> </select></form>
This is the result :
You can make the drop down menu more than one, just make the code more than one, so very simple.
Now, how to add this code to your blog. This is the step :
1. Login to blogger with your ID
2. After entering the dasboard page , click Layout.
3. Click at Page Element tab.
4. Click at Add a Page element.
5. After emerging pop up window , Click add to blog button for the things HTML/JavaScript.
6.Copy and paste the code below into available column :
<form><select onchange="window.open(this.options[this.selectedIndex].value,'_blank')" size="1" name="menu"><option>- Blog FOr Noob - </option><!-- change the links with your own --><option value="http://niteshkothari.com">Start to blogging</option> <option value="http://niteshkothari.com">Blog setting</option> <option value="http://niteshkothari.com">Backup template</option> <option value="http://niteshkothari.com">backup widget</option> </select></form>
7. Click Save
8. Finish. Please see the result.
Now you have a dropdown menu at your blog.
Add a Search Engine to Your Blog
Installation a search engine in blog of course will make your visitor is easier to find the articles in your blog, for the reason hence opening the big opportunity of your articles will in reading by many visitors.
To the point, to add this search engine to your blog, following this step :
* Login to blogger with your ID
* After entering the dasboard page , click Layout.
# Click at Page Element tab.
# Click at Add a Page element.
# After emerging pop up window , Click add to blog button for the things HTML/JavaScript.
# Copy and paste the code below into available column :
# Click Save Changes
* Finish. Please see the result.
At the code above, you'd meet the code be like this :
size="20"
The code is to arrange the wide of seach box. You can change it according to desire, ever greater of his value of course more wide. Example :
And you will find the code like this :
You can change this word with your word. Example :
Or possibly you still confuse with the steps above?
Just click the button for automatically install to your blog.
To the point, to add this search engine to your blog, following this step :
* Login to blogger with your ID
* After entering the dasboard page , click Layout.
# Click at Page Element tab.
# Click at Add a Page element.
# After emerging pop up window , Click add to blog button for the things HTML/JavaScript.
# Copy and paste the code below into available column :
<form id="searchThis" action="/search" style="display:inline;" method="get">
<input id="searchBox" name="q" size="20" type="text"/> <input id="searchButton" value="Search" type="submit"/>
</form>
# Click Save Changes
* Finish. Please see the result.
At the code above, you'd meet the code be like this :
size="20"
The code is to arrange the wide of seach box. You can change it according to desire, ever greater of his value of course more wide. Example :
size="25", size="30"
And you will find the code like this :
value="Search"
You can change this word with your word. Example :
value="GO !"
Or possibly you still confuse with the steps above?
Just click the button for automatically install to your blog.
Tuesday, March 24, 2009
Create Popup Image Viewer Using CSS in Blogger
To setup popup Image viewer in your blog First of all copy the following CSS Code and paste it between <head> and </head> Tags of your Template.
<style type="text/css">
.thumbnail{
position: relative;
z-index: 0;
}
.thumbnail:hover{
background-color: transparent;
z-index: 50;
}
.thumbnail span{ /*CSS for enlarged image*/
position: absolute;
background-color: #ffffff;
padding: 5px;
left: -1000px;
border: 1px solid #000;
visibility: hidden;
color: black;
text-decoration: none;
}
.thumbnail span img{ /*CSS for enlarged image*/
border-width: 0;
padding: 2px;
}
.thumbnail:hover span{ /*CSS for enlarged image on hover*/
visibility: visible;
top: 263px;
left:282px; /*position where enlarged image should offset horizontally */
}
</style>
Second step is to paste the following Code into your blog Posts.
<a class="thumbnail" href="#">
<img src="http://www.t2tibet.com/Images/mount-everest.jpg"
border="0" height="66" width="100" /><span>
<img src="http://www.t2tibet.com/Images/mount-everest.jpg" /></span></a>
Replace the Image Url above with your image Url and see your work done.
<style type="text/css">
.thumbnail{
position: relative;
z-index: 0;
}
.thumbnail:hover{
background-color: transparent;
z-index: 50;
}
.thumbnail span{ /*CSS for enlarged image*/
position: absolute;
background-color: #ffffff;
padding: 5px;
left: -1000px;
border: 1px solid #000;
visibility: hidden;
color: black;
text-decoration: none;
}
.thumbnail span img{ /*CSS for enlarged image*/
border-width: 0;
padding: 2px;
}
.thumbnail:hover span{ /*CSS for enlarged image on hover*/
visibility: visible;
top: 263px;
left:282px; /*position where enlarged image should offset horizontally */
}
</style>
Second step is to paste the following Code into your blog Posts.
<a class="thumbnail" href="#">
<img src="http://www.t2tibet.com/Images/mount-everest.jpg"
border="0" height="66" width="100" /><span>
<img src="http://www.t2tibet.com/Images/mount-everest.jpg" /></span></a>
Replace the Image Url above with your image Url and see your work done.
Give your SideBar A looks
First of all Goto Blogger's Edit Html Page (Sign in->Dashboard->Layout->Edit HTML).After that Paste the Following code Between <head> and </head> Tags in that Page.If you find the Code with .sidebar h2 { then replace that whole code .
.sidebar h2 {
background: #CCCBB9 url(http://img133.imageshack.us/img133/3540/h2bgwn2.png) top center no-repeat;
padding: 5px 10px;
margin-bottom: 0;
color: #333;
}
This code is for the Original Minima with Sidebar 220px which gives style to Sidebar Title.The Image used is of 220X10 size. If you have got Sidebar more than this then Make a picture Like this or Edit This to the width equal to your Sidebar.Then Upload that Image to Image host like Photobucket,Imageshack and replace the above Image Url with that Uploaded Image Url.
Now the second and the Last Step.Paste the following code with the above code in your Template.
.sidebar .widget-content {
border-left: 3px solid #CCCBB9;
border-right: 3px solid #CCCBB9;
border-bottom: 3px solid #e0d5c2;
padding: 10px;
}
.sidebar .widget {
margin: 0 0 20px 0;
padding: 0;
}
This code gives style to Sidebar Content.After you complete this tep Save your Template and see the result.
.sidebar h2 {
background: #CCCBB9 url(http://img133.imageshack.us/img133/3540/h2bgwn2.png) top center no-repeat;
padding: 5px 10px;
margin-bottom: 0;
color: #333;
}
This code is for the Original Minima with Sidebar 220px which gives style to Sidebar Title.The Image used is of 220X10 size. If you have got Sidebar more than this then Make a picture Like this or Edit This to the width equal to your Sidebar.Then Upload that Image to Image host like Photobucket,Imageshack and replace the above Image Url with that Uploaded Image Url.
Now the second and the Last Step.Paste the following code with the above code in your Template.
.sidebar .widget-content {
border-left: 3px solid #CCCBB9;
border-right: 3px solid #CCCBB9;
border-bottom: 3px solid #e0d5c2;
padding: 10px;
}
.sidebar .widget {
margin: 0 0 20px 0;
padding: 0;
}
This code gives style to Sidebar Content.After you complete this tep Save your Template and see the result.
Hide Posts count in Labels Widget
It is very easy to hide posts count in your labels widget.First of all sign in to blogger.After that goto Layout and then Edit HTML page.Now Expand Widget Templates by Checking on "Expand Widget Templates" and Find the following code.
<span dir="ltr">(<data:label.count>)</data:label.count></span>
All you have to do now is delete that code.Mission Accomplished!
<span dir="ltr">(<data:label.count>)</data:label.count></span>
All you have to do now is delete that code.Mission Accomplished!
Add share on Facebook Link and buttons on your blog
Add Share on Facebook Link or button on your blog to make it easier for the content to be shared on Facebook.Copy and Paste the following block of codes into your blog.
Share on Facebook
<script>function fbs_click() {u=location.href;t=document.title;window.open('http://www.facebook.com/sharer.php?u=' encodeURIComponent(u) '&t=' encodeURIComponent(t),'sharer','toolbar=0,status=0,width=626,height=436');return false;}</script><a href="http://www.facebook.com/share.php?u=<url>" onclick="return fbs_click()" target="_blank">Share on Facebook</a>
Share on Facebook
<script>function fbs_click() {u=location.href;t=document.title;window.open('http://www.facebook.com/sharer.php?u=' encodeURIComponent(u) '&t=' encodeURIComponent(t),'sharer','toolbar=0,status=0,width=626,height=436');return false;}</script><style> html .fb_share_link { padding:2px 0 0 20px; height:16px; background:url(http://static.ak.fbcdn.net/images/share/facebook_share_icon.gif?0:26981) no-repeat top left; }</style><a href="http://www.facebook.com/share.php?u=<url>" onclick="return fbs_click()" target="_blank" class="fb_share_link">Share on Facebook</a>
Share
<script>function fbs_click() {u=location.href;t=document.title;window.open('http://www.facebook.com/sharer.php?u=' encodeURIComponent(u) '&t=' encodeURIComponent(t),'sharer','toolbar=0,status=0,width=626,height=436');return false;}</script><style> html .fb_share_button { display: -moz-inline-block; display:inline-block; padding:1px 20px 0 5px; height:15px; border:1px solid #d8dfea; background:url(http://static.ak.fbcdn.net/images/share/facebook_share_icon.gif?0:26981) no-repeat top right; } html .fb_share_button:hover { color:#fff; border-color:#295582; background:#3b5998 url(http://static.ak.fbcdn.net/images/share/facebook_share_icon.gif?0:26981) no-repeat top right; text-decoration:none; } </style> <a href="http://www.facebook.com/share.php?u=<url>" class="fb_share_button" onclick="return fbs_click()" target="_blank" style="text-decoration:none;">Share</a>
Share on Facebook
<script>function fbs_click() {u=location.href;t=document.title;window.open('http://www.facebook.com/sharer.php?u=' encodeURIComponent(u) '&t=' encodeURIComponent(t),'sharer','toolbar=0,status=0,width=626,height=436');return false;}</script><a href="http://www.facebook.com/share.php?u=<url>" onclick="return fbs_click()" target="_blank">Share on Facebook</a>
Share on Facebook
<script>function fbs_click() {u=location.href;t=document.title;window.open('http://www.facebook.com/sharer.php?u=' encodeURIComponent(u) '&t=' encodeURIComponent(t),'sharer','toolbar=0,status=0,width=626,height=436');return false;}</script><style> html .fb_share_link { padding:2px 0 0 20px; height:16px; background:url(http://static.ak.fbcdn.net/images/share/facebook_share_icon.gif?0:26981) no-repeat top left; }</style><a href="http://www.facebook.com/share.php?u=<url>" onclick="return fbs_click()" target="_blank" class="fb_share_link">Share on Facebook</a>
Share
<script>function fbs_click() {u=location.href;t=document.title;window.open('http://www.facebook.com/sharer.php?u=' encodeURIComponent(u) '&t=' encodeURIComponent(t),'sharer','toolbar=0,status=0,width=626,height=436');return false;}</script><style> html .fb_share_button { display: -moz-inline-block; display:inline-block; padding:1px 20px 0 5px; height:15px; border:1px solid #d8dfea; background:url(http://static.ak.fbcdn.net/images/share/facebook_share_icon.gif?0:26981) no-repeat top right; } html .fb_share_button:hover { color:#fff; border-color:#295582; background:#3b5998 url(http://static.ak.fbcdn.net/images/share/facebook_share_icon.gif?0:26981) no-repeat top right; text-decoration:none; } </style> <a href="http://www.facebook.com/share.php?u=<url>" class="fb_share_button" onclick="return fbs_click()" target="_blank" style="text-decoration:none;">Share</a>
A simple hack to increase your Feedburner 's Feedcount
Everyone has a will to see more digits in their Feedburner's Feedcount Widget.If you are among them then this hack surely works on you.If you like to increase your Feedburner's Feedcount Hundred times more within a day then watch this video delivered by thenextweb.com.
Feedburner hacked! from Boris Veldhuijzen van Zanten on Vimeo.
Feedburner hacked! from Boris Veldhuijzen van Zanten on Vimeo.
Show Entrecard Recent Droppers
Showing Entrecard recent Droppers is also like showing Recent Posts and Recent Comments in your blog or is More easier than that.learn how to show recent Entrecard droppers in your blog.
Step 1:Sign in into your Entrecard Account.
Step 2:Right Click the RSS icon at Top Right then Click " Copy Link location".

Step 3:Sign in into Blogger
Step 4:Goto Blogger layout Section.
Step 5:Click on Add a new Gadget.After that a pop-up window will appear and Then Click Feed.
Step 6:Now Paste your Feed URl obtained from Step 2 there.
Step 7:Now change the Feed Title if you like and then Click Save.
Step 1:Sign in into your Entrecard Account.
Step 2:Right Click the RSS icon at Top Right then Click " Copy Link location".
Step 3:Sign in into Blogger
Step 4:Goto Blogger layout Section.
Step 5:Click on Add a new Gadget.After that a pop-up window will appear and Then Click Feed.
Step 6:Now Paste your Feed URl obtained from Step 2 there.
Step 7:Now change the Feed Title if you like and then Click Save.
Show Technorati blog Reactions link below each posts
Many people know Technorati Link Count Widget as Technorati view Blog Reactions Link,whatever It is same.When some people Links on your post Technorati tracks the Links and makes it possible to display the links with the help of this Widget.

n another sense it is also a blogger hack that helps you display the number of reactions of Links associated that that post.In the Original Technorati Code you can provide only one Link and it shows the reactions only for that Link otherwise you should have to paste the code in each and every post.
To put Link Count Widget on your blog Goto blogger Edit Html Page and Expand Template Widget.This Link seems Good when it is placed with comments count Link.For that search for <span class='post-labels'> .............</span> and Paste the following Just after that Code.
| <script src='http://embed.technorati.com/linkcount' type='text/javascript'/>
<a class='tr-linkcount' expr:href='"http://technorati.com/search/" data:post.url ' id='technauthority' style='background: url(http://static.technorati.com/static/css/img/icn/talkbubble.png) no-repeat; background-position:right; padding-right:20px;' target='_blank'>View blog reactions</a>
Here data:post.url Explains the Link of the Individual post.
Once you set up this Code in your blog the code will automatically detect the number of Reactions for that post and automatically shows the number of Reactions..
n another sense it is also a blogger hack that helps you display the number of reactions of Links associated that that post.In the Original Technorati Code you can provide only one Link and it shows the reactions only for that Link otherwise you should have to paste the code in each and every post.
To put Link Count Widget on your blog Goto blogger Edit Html Page and Expand Template Widget.This Link seems Good when it is placed with comments count Link.For that search for <span class='post-labels'> .............</span> and Paste the following Just after that Code.
| <script src='http://embed.technorati.com/linkcount' type='text/javascript'/>
<a class='tr-linkcount' expr:href='"http://technorati.com/search/" data:post.url ' id='technauthority' style='background: url(http://static.technorati.com/static/css/img/icn/talkbubble.png) no-repeat; background-position:right; padding-right:20px;' target='_blank'>View blog reactions</a>
Here data:post.url Explains the Link of the Individual post.
Once you set up this Code in your blog the code will automatically detect the number of Reactions for that post and automatically shows the number of Reactions..
How to create section to add Gadgets in your header section?
Creating a section in blog header lets you add gadgets in your blog below and above your blog header.It is much more easy to create a section to add gadgets below and above your blog header.Follow the simple tutorials below and know how to create it.
Search for the code with id='header' in the code section of your blog without expanding widget templates.The block of code looks like this.
<div id='header-wrapper'>
<b:section class='header' id='header' maxwidgets='1' showaddelement='no'>
<b:widget id='Header1' locked='true' title='Bloganol Sample Blog (Header)' type='Header'/>
</b:section>
</div>
Now change showaddelement='no' to showaddelement='Yes' and maxwidgets='5' like below.Here maxwidgets='5' means you can add maximum 5 widgets in your header section.
<div id='header-wrapper'>
<b:section class='header' id='header' maxwidgets='5' showaddelement='yes'>
<b:widget id='Header1' locked='true' title='Bloganol Sample Blog (Header)' type='Header'/>
</b:section>
</div>
After you finish this save your Template.
Search for the code with id='header' in the code section of your blog without expanding widget templates.The block of code looks like this.
<div id='header-wrapper'>
<b:section class='header' id='header' maxwidgets='1' showaddelement='no'>
<b:widget id='Header1' locked='true' title='Bloganol Sample Blog (Header)' type='Header'/>
</b:section>
</div>
Now change showaddelement='no' to showaddelement='Yes' and maxwidgets='5' like below.Here maxwidgets='5' means you can add maximum 5 widgets in your header section.
<div id='header-wrapper'>
<b:section class='header' id='header' maxwidgets='5' showaddelement='yes'>
<b:widget id='Header1' locked='true' title='Bloganol Sample Blog (Header)' type='Header'/>
</b:section>
</div>
After you finish this save your Template.
Show Commentators Photo inside comments in Blogger
This is just another and important hack in the Bloggers hacks directory.This hack helps you show the photo of the commentator embedded on the left side of the comment or below the commentator's name.I have also performed this hack in my blog.Now whenever Blogger users comment in my blog with their Blogger Profile then their photo will be obviously shown in the left side of their comment just like below.
First of all copy the following code and Paste it in your blog Just above </head> tag.
<script src='http://bloganolutilities.googlepages.com/blogger_comment_photos.js' type='text/javascript'/>
<script type='text/javascript'>
//<![CDATA[
addLoadEvent(function(){showCommentPhotos('commentphoto','comment-author', 1);});
//]]>
</script>
Now in Second step search for the following Block of code.
<dl id='comments-block'>
<b:loop values='data:post.comments' var='comment'>
<dt class='comment-author' expr:id='"comment-" data:comment.id'>
<a expr:name='"comment-" data:comment.id'/>
<b:if cond='data:comment.authorUrl'>
<a expr:href='data:comment.authorUrl' rel='nofollow'><data:comment.author/></a>
<b:else/>
<data:comment.author/>
</b:if>
<data:commentPostedByMsg/>
</dt>
<dd class='comment-body'>
<b:if cond='data:comment.isDeleted'>
<span class='deleted-comment'><data:comment.body/></span>
<b:else/>
<p><data:comment.body/></p>
</b:if>
</dd>
<dd class='comment-footer'>
<span class='comment-timestamp'>
<a expr:href='"#comment-" data:comment.id' title='comment permalink'>
<data:comment.timestamp/>
</a>
<b:include data='comment' name='commentDeleteIcon'/>
</span>
</dd>
</b:loop>
</dl>
After you Find searching the whole block of code,select the Codes and replace it with the following block of codes.
<dl id='comments-block'>
<b:loop values='data:post.comments' var='comment'>
<dt class='comment-author' expr:id='"comment-" data:comment.id'>
<a expr:name='"comment-" data:comment.id'/>
<b:if cond='data:comment.authorUrl'>
<a expr:href='data:comment.authorUrl' rel='nofollow'><data:comment.author/></a>
<b:else/>
<data:comment.author/>
</b:if>
<data:commentPostedByMsg/>
</dt>
<dd class='comment-body'>
<div class='commentphoto' style='float:left;margin:5px;'/>
<b:if cond='data:comment.isDeleted'>
<span class='deleted-comment'><data:comment.body/></span>
<b:else/>
<p><data:comment.body/></p>
</b:if>
</dd>
<dd class='comment-footer'>
<span class='comment-timestamp'>
<a expr:href='"#comment-" data:comment.id' title='comment permalink'>
<data:comment.timestamp/>
</a>
<b:include data='comment' name='commentDeleteIcon'/>
</span>
</dd>
<div style='clear:both;'/>
</b:loop>
</dl>
After you replace the code Save your the Template and see the photos of your Commentators.Enjoy.
First of all copy the following code and Paste it in your blog Just above </head> tag.
<script src='http://bloganolutilities.googlepages.com/blogger_comment_photos.js' type='text/javascript'/>
<script type='text/javascript'>
//<![CDATA[
addLoadEvent(function(){showCommentPhotos('commentphoto','comment-author', 1);});
//]]>
</script>
Now in Second step search for the following Block of code.
<dl id='comments-block'>
<b:loop values='data:post.comments' var='comment'>
<dt class='comment-author' expr:id='"comment-" data:comment.id'>
<a expr:name='"comment-" data:comment.id'/>
<b:if cond='data:comment.authorUrl'>
<a expr:href='data:comment.authorUrl' rel='nofollow'><data:comment.author/></a>
<b:else/>
<data:comment.author/>
</b:if>
<data:commentPostedByMsg/>
</dt>
<dd class='comment-body'>
<b:if cond='data:comment.isDeleted'>
<span class='deleted-comment'><data:comment.body/></span>
<b:else/>
<p><data:comment.body/></p>
</b:if>
</dd>
<dd class='comment-footer'>
<span class='comment-timestamp'>
<a expr:href='"#comment-" data:comment.id' title='comment permalink'>
<data:comment.timestamp/>
</a>
<b:include data='comment' name='commentDeleteIcon'/>
</span>
</dd>
</b:loop>
</dl>
After you Find searching the whole block of code,select the Codes and replace it with the following block of codes.
<dl id='comments-block'>
<b:loop values='data:post.comments' var='comment'>
<dt class='comment-author' expr:id='"comment-" data:comment.id'>
<a expr:name='"comment-" data:comment.id'/>
<b:if cond='data:comment.authorUrl'>
<a expr:href='data:comment.authorUrl' rel='nofollow'><data:comment.author/></a>
<b:else/>
<data:comment.author/>
</b:if>
<data:commentPostedByMsg/>
</dt>
<dd class='comment-body'>
<div class='commentphoto' style='float:left;margin:5px;'/>
<b:if cond='data:comment.isDeleted'>
<span class='deleted-comment'><data:comment.body/></span>
<b:else/>
<p><data:comment.body/></p>
</b:if>
</dd>
<dd class='comment-footer'>
<span class='comment-timestamp'>
<a expr:href='"#comment-" data:comment.id' title='comment permalink'>
<data:comment.timestamp/>
</a>
<b:include data='comment' name='commentDeleteIcon'/>
</span>
</dd>
<div style='clear:both;'/>
</b:loop>
</dl>
After you replace the code Save your the Template and see the photos of your Commentators.Enjoy.
Comment numbering in Blogger
this hack will show numbering in comment section
Goto Blogger Edit Html page , Expand Widget Templates and Search for the Following block of codes.
<dl id='comments-block'>
<b:loop values='data:post.comments' var='comment'>
<dt class='comment-author' expr:id='"comment-" data:comment.id'>
<a expr:name='"comment-" data:comment.id'/>
<b:if cond='data:comment.authorUrl'>
<a expr:href='data:comment.authorUrl' rel='nofollow'><data:comment.author/></a>
<b:else/>
<data:comment.author/>
</b:if>
<data:commentPostedByMsg/>
</dt>
<dd class='comment-body'>
<b:if cond='data:comment.isDeleted'>
<span class='deleted-comment'><data:comment.body/></span>
<b:else/>
<p><data:comment.body/></p>
</b:if>
</dd>
<dd class='comment-footer'>
<span class='comment-timestamp'>
<a expr:href='"#comment-" data:comment.id' title='comment permalink'>
<data:comment.timestamp/>
</a>
<b:include data='comment' name='commentDeleteIcon'/>
</span>
</dd>
</b:loop>
</dl>
Now in second step , replace the above block of codes with the following block of codes.
<dl id='comments-block'>
<script type='text/javascript'>var CommentsCounter=0;</script>
<b:loop values='data:post.comments' var='comment'>
<div class='' expr:id='data:comment.id'>
<dt expr:class='"comment-author " data:comment.authorClass' expr:id='data:comment.anchorName'>
<a expr:name='data:comment.anchorName'/>
<b:if cond='data:comment.authorUrl'>
<a expr:href='data:comment.authorUrl'><data:comment.author/></a>
<b:else/>
<data:comment.author/>
</b:if>
<data:commentPostedByMsg/>
<span class='comment-number'>
<a expr:href='"#comment-" data:comment.id' title='Comment Link'>
<script type='text/javascript'>
CommentsCounter=CommentsCounter 1;
document.write(CommentsCounter)
</script>
</a>
</span>
</dt>
<dd class='comment-body'>
<b:if cond='data:comment.isDeleted'>
<span class='deleted-comment'><data:comment.body/></span>
<b:else/>
<p><data:comment.body/></p>
</b:if>
</dd>
<dd class='comment-footer'>
<span class='comment-timestamp'>
<a expr:href='data:comment.url' title='comment permalink'>
<data:comment.timestamp/>
</a>
<b:include data='comment' name='commentDeleteIcon'/>
</span>
</dd>
</div>
</b:loop>
</dl>
Now in last Step you need to style the numbering.For that add the following codes just above ]]></b:skin>: in your Template.
.numberingcomments{
float: right;
display: block;
width: 50px;
margin-right: 5px;
margin-top: -35px; /*comments-counter position*/
text-align: right;
font-family: 'Century Gothic','Lucida Grande',Arial,Helvetica,Sans-Serif;
font-size: 30px;
font-weight: normal;
}
/*since the numbers are actually links, we need to force the color properties*/
.numberingcomments a:link, .numberingcomments a:visited {color: #445566 !important; text-decoration: none !important;}
.numberingcomments a:hover, .numberingcomments a:active {color: #FF9933 !important; text-decoration: none !important;}
After you complete the above steps,Save the Template and see the comment numbering in your blog.
Goto Blogger Edit Html page , Expand Widget Templates and Search for the Following block of codes.
<dl id='comments-block'>
<b:loop values='data:post.comments' var='comment'>
<dt class='comment-author' expr:id='"comment-" data:comment.id'>
<a expr:name='"comment-" data:comment.id'/>
<b:if cond='data:comment.authorUrl'>
<a expr:href='data:comment.authorUrl' rel='nofollow'><data:comment.author/></a>
<b:else/>
<data:comment.author/>
</b:if>
<data:commentPostedByMsg/>
</dt>
<dd class='comment-body'>
<b:if cond='data:comment.isDeleted'>
<span class='deleted-comment'><data:comment.body/></span>
<b:else/>
<p><data:comment.body/></p>
</b:if>
</dd>
<dd class='comment-footer'>
<span class='comment-timestamp'>
<a expr:href='"#comment-" data:comment.id' title='comment permalink'>
<data:comment.timestamp/>
</a>
<b:include data='comment' name='commentDeleteIcon'/>
</span>
</dd>
</b:loop>
</dl>
Now in second step , replace the above block of codes with the following block of codes.
<dl id='comments-block'>
<script type='text/javascript'>var CommentsCounter=0;</script>
<b:loop values='data:post.comments' var='comment'>
<div class='' expr:id='data:comment.id'>
<dt expr:class='"comment-author " data:comment.authorClass' expr:id='data:comment.anchorName'>
<a expr:name='data:comment.anchorName'/>
<b:if cond='data:comment.authorUrl'>
<a expr:href='data:comment.authorUrl'><data:comment.author/></a>
<b:else/>
<data:comment.author/>
</b:if>
<data:commentPostedByMsg/>
<span class='comment-number'>
<a expr:href='"#comment-" data:comment.id' title='Comment Link'>
<script type='text/javascript'>
CommentsCounter=CommentsCounter 1;
document.write(CommentsCounter)
</script>
</a>
</span>
</dt>
<dd class='comment-body'>
<b:if cond='data:comment.isDeleted'>
<span class='deleted-comment'><data:comment.body/></span>
<b:else/>
<p><data:comment.body/></p>
</b:if>
</dd>
<dd class='comment-footer'>
<span class='comment-timestamp'>
<a expr:href='data:comment.url' title='comment permalink'>
<data:comment.timestamp/>
</a>
<b:include data='comment' name='commentDeleteIcon'/>
</span>
</dd>
</div>
</b:loop>
</dl>
Now in last Step you need to style the numbering.For that add the following codes just above ]]></b:skin>: in your Template.
.numberingcomments{
float: right;
display: block;
width: 50px;
margin-right: 5px;
margin-top: -35px; /*comments-counter position*/
text-align: right;
font-family: 'Century Gothic','Lucida Grande',Arial,Helvetica,Sans-Serif;
font-size: 30px;
font-weight: normal;
}
/*since the numbers are actually links, we need to force the color properties*/
.numberingcomments a:link, .numberingcomments a:visited {color: #445566 !important; text-decoration: none !important;}
.numberingcomments a:hover, .numberingcomments a:active {color: #FF9933 !important; text-decoration: none !important;}
After you complete the above steps,Save the Template and see the comment numbering in your blog.
Give style to your Blog Link Titles
NiceTitle is a relatively simple script that creates a div-container that pops up when a link (with the title attribute is hovered. This script shows the title of the link plus the URL links redirect to when the links are hovered.
Setting up this script is also same like adding other codes in Blogger.You just need to Paste the CSS plus JavaScript code in your blog Code Section.To setup this script in your blog Just follow the simple steps below.
1. Download nicetitle.js and Upload it to your Googlepages account.
2. After that Goto Edit Html Page from your Blogger Dashboard after you Log in to your Blogger Account.
3. After that add the following lines of code just before </head> in your Template.
<script type="text/javascript" src="nicetitle.js"></script>
4. Next step is you should add style to this Script.For that Add the following block of codes just above ]]</b:skin> in your Template.
div.nicetitle {
background-color: #A38531;
color: #fff;
font: bold 13px "Trebuchet MS", Verdana, Arial, sans-serif;
padding: 4px;
position: absolute; top: 0; left: 0;
text-align: left;
width: 25em;
z-index: 20;
}
div.nicetitle p {
margin: 0;
padding: 0 3px;
}
div.nicetitle p.destination {
font-size: 9px;
padding-top: 3px;
text-align: left;
}
After you complete the above steps Save your Template and don't forget to use Title in your Links.
1. Download nicetitle.js and Upload it to your Googlepages account.
2. After that Goto Edit Html Page from your Blogger Dashboard after you Log in to your Blogger Account.
3. After that add the following lines of code just before </head> in your Template.
<script type="text/javascript" src="nicetitle.js"></script>
4. Next step is you should add style to this Script.For that Add the following block of codes just above ]]</b:skin> in your Template.
div.nicetitle {
background-color: #A38531;
color: #fff;
font: bold 13px "Trebuchet MS", Verdana, Arial, sans-serif;
padding: 4px;
position: absolute; top: 0; left: 0;
text-align: left;
width: 25em;
z-index: 20;
}
div.nicetitle p {
margin: 0;
padding: 0 3px;
}
div.nicetitle p.destination {
font-size: 9px;
padding-top: 3px;
text-align: left;
}
After you complete the above steps Save your Template and don't forget to use Title in your Links.
Subscribe to:
Posts (Atom)