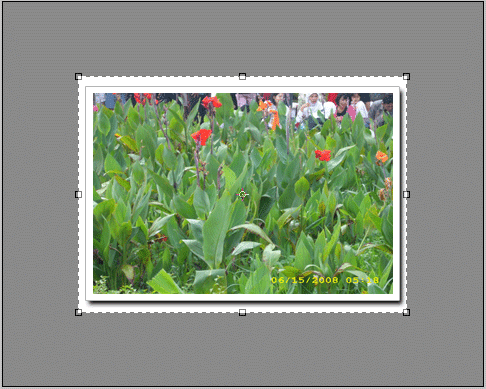
To create the frame effect at Adobe Photoshop is very easy and maybe needs time not more than one minute, but that is for an expert not for those who are not yet familiar with that program. For those who are still confused to create a frame as the example above at Photoshop, Kang Rohman has written the guides as below. I hope that it is not disappointing.
First to be noted that there are a lot of ways to create a frame, people say many ways to Rome, so the guides below is one of many ways that Kang Rohman can do. The second one that Kang Rohman uses Adobe Photoshop CS2 in this tutorial, if you are not using that version, you can adapt it because there are not so many difference among them. Let’s get started!
- Prepare one image you want to add the frame to it.
- Open your Adobe Photoshop program
- Click File menu, then select Open…, or press Ctrl + O on your keyboard. Please refer to the folder where your image is stored
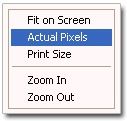
- Be sure that your image in 100% scale because usually the image will appear first in less scale. Select Zoom Tool (Z), right click on the image, and then after the selections appear, select Actual Pixels.
- If the image to be edited has too large size, you can reduce it. Click Image menu then select Image Size…, or press Alt + C + I on your keyboard. Set the size you want. E.g.: Width: 300 pixels.
- In order to add the frame to the edge of the image, you need to resize the Canvas becomes the larger one than the image size. To do this, click Image menu, select Canvas Size…, or press Alt + Ctrl + C on your keyboard, set the canvas size into larger. For example, if previously it has the size as Width: 300 pixels and height 201 pixels, set to the ones become Width: 350 pixels and height: 250 pixels.
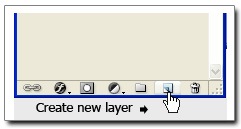
- Please create a new layer. Click Layer menu then select New and choose Layer…, or press Shift + Ctrl + N on your keyboard, give a name to your new layer (anything). Or another way is just click the icon Create New Layer
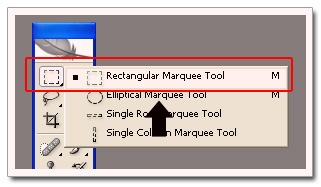
- On the tool menu, select the Rectangular Marquee Tool (a dash-line box). If another one appears, just right click on the tool then select Rectangular Marquee Tool
- The cursor will change automatically becoming the sign plus (+), navigate the cursor to the top left corner of the image and give the space so that it will be formed as a frame. Press the left mouse button, hold and drag to the lower right corner of the image so that it will be formed as a dash-line rectangular that surrounds your image. Release the mouse button you held.
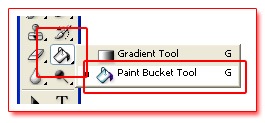
- Still on the tool menu, select Paint Bucket Tool (Paint bucket shaped tool) , if another one appears, just right click on the tool, the select Paint Bucket Tool
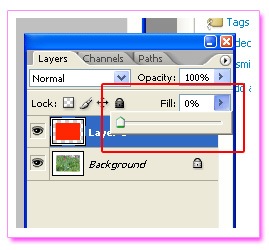
- Fill (click) at the area inside the dash-line rectangular you have made as above. You will see the image will be covered by the default color, change the Fill into 0% so that it will be back to transparent.
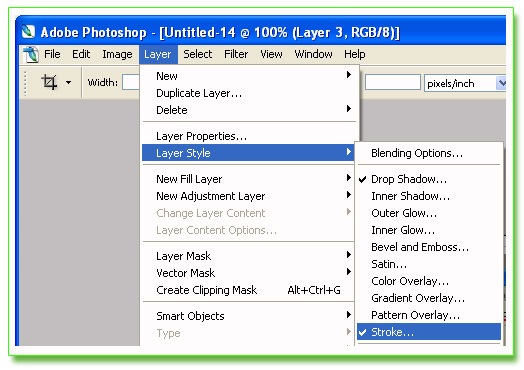
- Click Layer menu then select Layer Style then choose Stroke…, or click the icon Add a Layer style then select Stroke…
- Set the Size into 1 (one), and click at Color to change the color as you want, after the color selection appears, click on the color you want, the click OK.
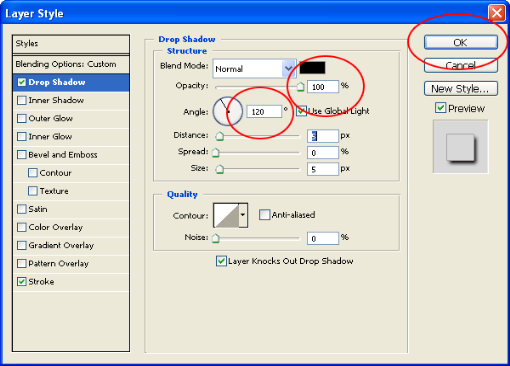
- Still on the Layer Style, select and click on Drop Shadow. Set the Angle at 120 and Opacity at 100 (it is an example) then click OK
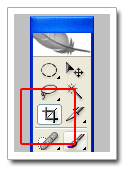
- Now your image has a frame. The next step is to crop the image with Crop Tool. Select Crop Tool on the tool menu; navigate the pointer to the top left corner of the frame. Press the left mouse button, hold and drag to bottom right corner of the frame, release. Double click on the cropped-image area. Now the image has been cropped.
- Click File menu then select Save for Web…, on the option tab, select 4-Up tab. Select the image format you want (GIF, JPEG, PNG-8, PNG-24). Click SAVE button and give a name to your image, then Click Save.
- Done
It is very easy, isn’t it? Have a good experiment!







Comments :
0 comments to “Basic techniques to create a frame”
Post a Comment